As long as I posted a birthday Hot Pot, I need to post the birthday dessert.

I like a good cheesecake. Sadly, most restaurants sell you a Sysco cheesecake or similar mass produced thing. I only order a restaurant cheesecake if its made in house. It's sad really because a good cheesecake isn't particularly hard to make. There are a few techniques that improve the cheesecake and they do add a little work to the process, but it's nothing hard.
A good cheesecake should be dense, tall and rich with a smooth creamy custardy texture. Not too sweet either.
Equipment
Pan--traditionally a 9 or 10 inch springform pan. I've used a number of different springform pans and have largely given up on them. If you have one you like, go ahead and use it. I've taken to using an 8 inch round silicone cake pan. I should get a 9 or 10 inch silicone cake pan and it would simplify things for me a bit. If you're using a cake pan, you'll also need parchment paper so you can release it from the mold.
A rimmed baking sheet or roasting pan-- big enough to hold the cake and surround it with water
A food processor or blender-- a mixer won't create a smooth even batter. The down side of this tool is that it adds in air but that can be fixed. When I made this with my 9 cup KitchenAid food processor, I had to do it in batches. With my 11 cup Cuisinart, I can make it in one batch. I don't have a blender but it should produce an even smoother batter than the food processor. The food processor leaves small bits of cream cheese, but it's smooth enough. But I don't make specialty drinks so I don't have much use for a blender.
I did this once with a handheld immersion blender. It worked, but it about burned out the blender. It's not really up to the task.
Crust Ingredients
If you have a crust you like, use it. Graham crackers, nuts, cookies, they all work. I use Vanilla Wafers for a plain cheesecake. I get more adventurous with other flavors of cheesecake.
1 3/4 cup Vanilla Wafers when crushed to crumbs yields 1 cup crumbs.
1/4 cup sugar
1/4 cup butter, melted
Set your oven to 325 with a rack in the lower third.
Cut a piece of parchment paper to fit the pan. Details on cutting the parchment are at the end of this post. Use a spray oil to grease the pan, then set in the parchment. The oil film holds the parchment flat so you can easily form the crust.
Crush the Vanilla Wafers in the food processor and let it mix in the sugar as well. Pour the crumb mixture into the pan on top of the parchment paper.

Make a well in the center of the crumbs. Pour in the melted butter. Mix the butter into the crumbs. I like to use a fork, but use what you like. Spread them out into an even layer.


Then press them into a tight packed layer. A measuring cup, drinking glass or similar object with straight sides makes this easier. I like to use my meat tenderizing disk for this. Give your packing tool a light twist as you remove it from the crumbs. This helps shear the crumbs off the tool and keep your crust intact.

Bake for 12-15 minutes. If you're using a silicone cake pan, use the sheet pan with it to keep the bottom rigid and crack free.


Filling Ingredients
Don't skimp. Low fat, or non-fat cream cheese, sour cream substitutes and such do not make a good cheesecake. Use real vanilla, not imitation. If you want to cut back on the calories and fat, cut a thin slice and exercise will power. But enjoy yourself with the great cheesecake that this is.
Similarly, buy a good grade of cream cheese. The off brands often cut back on the cream. Philadelphia will work well. I usually buy a 3 pound brick of Raskas Cream Cheese from Costco and I like that the best. I give a volume measurement for the sour cream. That's not really easy to measure and it makes a mess. If you have a kitchen scale, it's much easier and more accurate to weigh it out.
Ingredients should be at room temperature.
2 pounds of cream cheese and cut in cubes, about 2 oz each
3 cups of sour cream--27 ounces You can use a full 24 oz container if that's better for you and it will work out just fine. But it's even better with those extra 3 ounces.
4 eggs
4 teaspoons vanilla extract (1 tablespoon + 1 teaspoon)
1 cup sugar
Set the oven to 325 with the rack in the lower third of the oven. If you used my crust recipe, things should be ready to go.
Combine the ingredients in a food processor or blender until smooth. Work in batches as necessary.

If you're working in batches, pour your batches in to a large bowl and mix to combine and work out any uneven quantities from the batches. With the food processor work bowl or large bowl, tap the bowl onto your counter from about an inch height. It takes about 5 taps to form each bubble of air and bring it to the surface. Keep tapping until you get no new bubbles coming up after 10 or 15 taps in a row. There are air bubbles rising to the surface in the picture below.

If you're using a spring form pan, wrap the pan in a single layer of aluminum foil on the outside. You must have no seams where the water from the bain marie can get in. A springform pan will let water in unless you wrap it in foil first.
Pour the batter into your pan form with the baked crust. Smooth it out

Because my pan is a bit undersized, I also pour the extra batter in to a silicone muffin pan and make some small cheesecake pucks which I cook for only a short time.
Technique 2--Cook in a water bath, or bain marie
Put the pan in the oven on the rimmed baking sheet but with a corner sticking out for easy access for adding water. Pour in enough hot water to come up halfway on the cheesecake pan. Put the bain marie fully into the oven and cook for 1 hour and 15 minutes.

The water bath evens out heat and helps prevent overcooking the outer edges before the center sets fully. At the end of the cooking time, the cheesecake will be ivory colored with some light browning, usually more at the edges. You might see some shallow cracking on the surface, again usually towards the edges. Don't worry, the cake will shrink down and virtually heal those cracks. Note how it's puffed up above the rim of the pan about 3/4 of an inch.

Technique 3-- Coast to the finish
After the hour and 15 minutes, the cheese cake will not be done cooking. Turn the oven off and let it finish cooking and start cooling down in the oven with the door closed for 1 hour.
I use the time bake feature on my oven for this so I don't have to stress about timing at all. I know the oven will go off on time and I only have to mark my mind for the total two hours and 15 minutes. So I can go run an errand or whatever. Makes it simple.
If you click the image below, you'll see some minor cracking at the 7-5 o'clock areas, and up around 10 and 2. Those will heal down to minor creases. Also note how the cake has dropped about 1/2 inch in height. It will drop down about flush with the pan when fully cooled.

Technique 4--The Full Cure
Remove the cheesecake from the water bath and chill for 8 hours. So make this in the morning if you want to eat it for dinner that night. If you're afraid of spilling hot water, lift it out on a wide spatula, board or whatever is thin, broad and stiff.
If you ever taste a bit of cheesecake warm from the oven, it has very little flavor. It's surprising because foods to be eaten cool or cold are usually overseasoned so they taste correct at the cold temperature. And even after 4 hours chilling down, the flavor still hasn't really developed. it takes a good 6-8 hours after coming out of the oven for the full flavor impact.
Result of the Techniques
Cooking the cheesecake in this way ensures that the cake is evenly cooked throughout, remains dense and self heals any shallow cracks that occur.

Unmolding the Cheesecake
If you used a cake pan, it's trickier. Run the knife around the edge of the pan as with the springform pan. Cover the cake and pan with some plastic wrap. Invert it onto a cutting board. Flex the silicone around the base edges to break the seal between the pan and the parchment paper. Lift the pan slowly increasing the release from the pan and paper as you lift. When it lets go, slide the pan completely off. The cheesecake is dense and sturdy and can support itself without fear of it collapsing.

Peel off the parchment paper. Occasionally a piece of crust may pop free. Simply put it back in place like a puzzle piece. It will stick to the cheesecake for serving.

Put the serving plate on the crust, and reinvert the the plate, cake and board. Lift off the board, wrap the plastic wrap and the cake and refrigerate until service. The board was never even dirtied. And yes, a piece of crust did pop free. Can you tell where it was? No, it's not the light spot towards the bottom left. The lines are from the creases in the parchment paper.
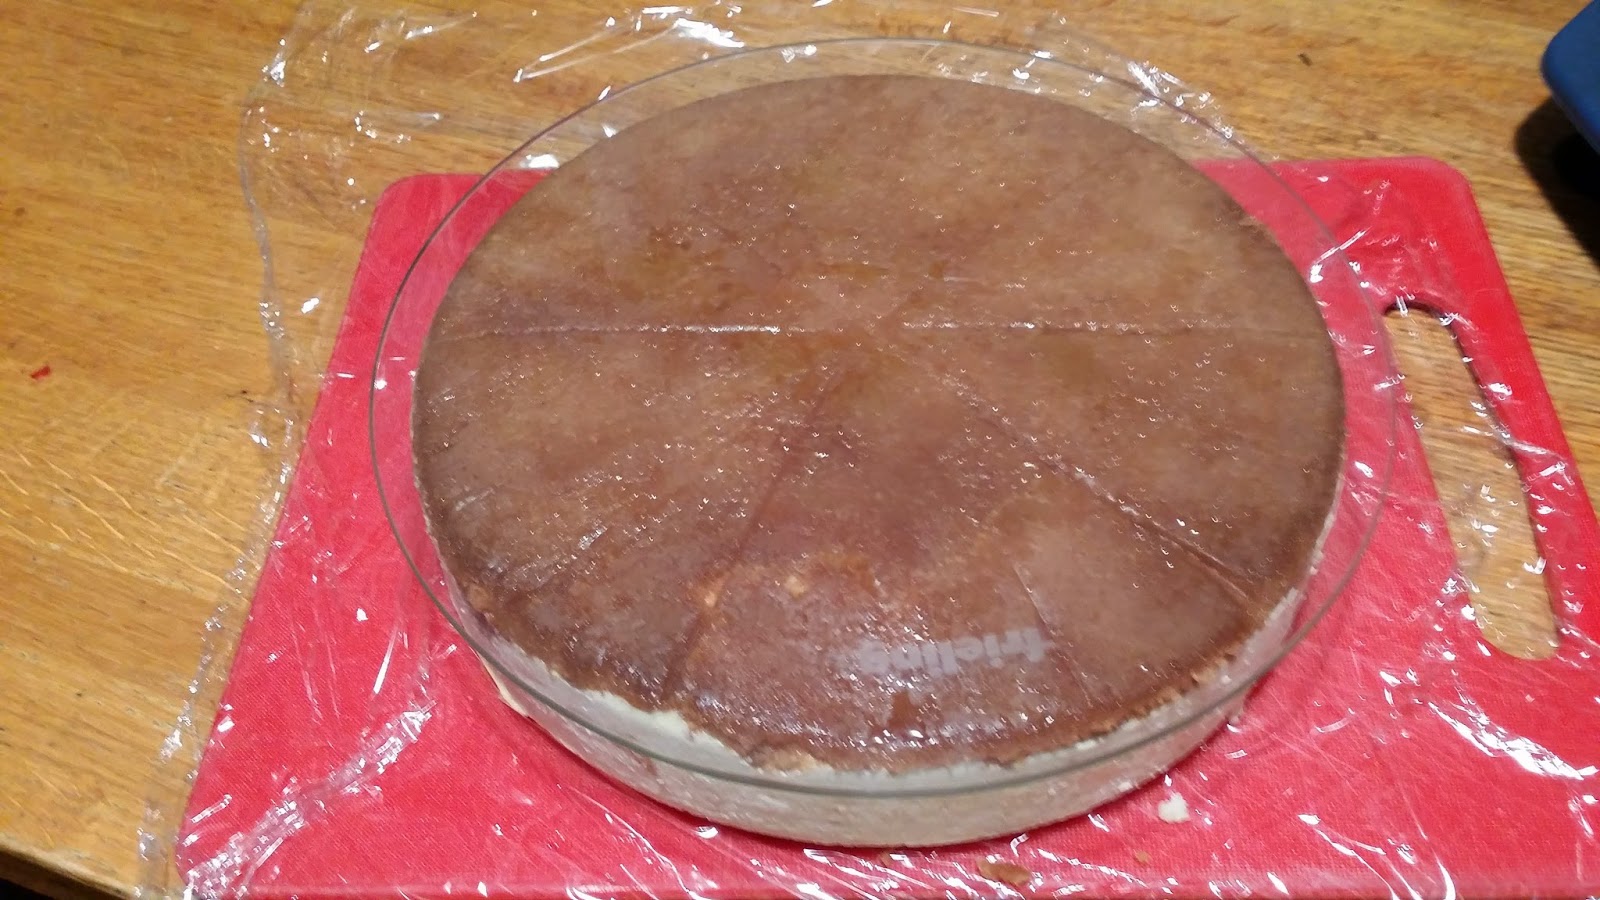
If you click on this image below, the enlargement shows some creases running from about 7 O'clock over to 5 Oclock and two small ones around 10 and the other over around two. These are the remains of small shallow cracks that self heal as it cools. Compare that against the cracking picture in the Further Discussion section below.
Serving
A damp knife blade makes a cleaner cut. Wipe the blade between cuts for best presentation. Note the even texture throughout the cake from the center to the edge.
Further Discussion
The springform disappointment
I tried nonstick springforms, textured aluminum, glass bases. They all are problematic in leaking. After some use, they all impart off metallic flavors under the long curing time of this cake. The base is annoying to serve from unless you have the glass base. They're a little finicky to store compared to a solid pan.
And it discolors my baking sheets when I use the foil wrapped springform with my aluminum rimmed baking sheets as the bain marie.
In the end, they're just not necessary. Lift out bases are better for tender fillings and silicone cake pans eliminate flavor issues and are water tight.
Cracking
For a first effort with no water bath, this is a respectable cake from the blog Little Bit Sweet I use the image here just to demonstrate the more serious form of cracking in cheesecakes.

The main issue in cracking is that the batter has puffed from heat expansion. The outer surface is drying and thus shrinking. This is why cracks happen the most at the edges of the top during baking. That's where the batter has heat exposure on the side and the top. And then when cooling, the contraction of the outer edges is faster than the center leading to the sort of cracks in the image above.
Controlling cracks is about three things.
1. Minimizing heat differences
Using room temperature ingredients is important. You can't make this cheesecake with cold batter. The cooking times would be too short and you will have cracking problems. Also, the water bath keeps the temperatures below boiling around the cheesecake thus buffering the heat. The cool down in the oven also helps minimizing cracking as it cools slowly and evenly.
2. Air in the batter
Mixing the ingredients smoothly will add air to the batter, a food processor or blender even more so than a stand mixer. Air in the batter makes the cheese cake rise even more in the oven leading to a highly puffed cheesecake that then falls. This movement leads to cracks, usually some overcooking making for a curdled crumbiness to cheescake too. The tapping technique is important to getting as much air out of the batter as possible.
If you see a recipe going for a light and airy cheesecake, it's going to have problems in texture, flavor and cracking. And it's really a different dish than the custard that a cheesecake really is.
3. Batter issues
This is more the fault of the recipe writer than the cook. A custard is about getting the proteins to set up just right. So the recipe has to manage liquid, eggs, and cream cheese properly. There's a range where it works, beyond that it cracks and maybe gets runny or with a coagulated grainy crumb.
Shirley Corriher in Bakewise espouses flour as the solution. The vigorous mixing from the food processor activates the gluten in the flour and that gives the structure needed to the final product. As far as it goes, that's true. But flour mutes the taste of the cheesecake and creates a more gummy texture that's a problem in its own right.
Toppings
Plain cheesecake is best plain. So many places add a goopy over-sweetened pie type fruit topping. It's too sweet and the wrong accent. If you want fruit, use a lightly sugar macerated fresh or frozen fruit, sliced as needed.
Lemon, lime or orange curd is a good compatible topping as well.
Cheesecake varieties
Once you start getting into pumpkin, chocolate, caramel and such, the cheesecake gets quite different. The sugar goes up and the nuances of the cream cheese gets lost. Certainly there are good cheesecakes of these types but they're even scarcer than a good plain cheesecake.
The marbled approach is better I think. Where you get strong bites of each type of flavor to compare and contrast on your palate. Even going so far as to where a cheesecake and chocolate cake combine as in a Black Bottom Cupcake.
Cutting the parchment paper to a round
Fold the parchment in half and then half again. The corner where all the creases meet will be the point in all subsequent folds.

Fold it in half at an angle this time.

If you keep folding and sandwiching the creases, the point tends to drift off center and you end up with an oval that won't fit right. So alternate the direction of the next fold.


Hold the point at the center of the pan and then trim the edge. It's better to err on the large side than the small side as you can always trim off more but you can't add it back on.

It took two trims to get a good tight fit.

Test the fit with it open to judge whether more trimming is necessary.

I love this cheesecake! Nothing else quite compares.
ReplyDelete